Every brand has a space it keeps coming back to for lookbooks. That one wall in the corner of the store, the window in the showroom, the lighting you set up in the same spot every time. Shoot there season after season and your product pages read as one line, and customers scrolling through recognize it — "ah, that's them."
StyleRoom lets you register that space as a background only your brand uses. From the top menu, open [Brand Hall] → [Create a Basic Studio Set].
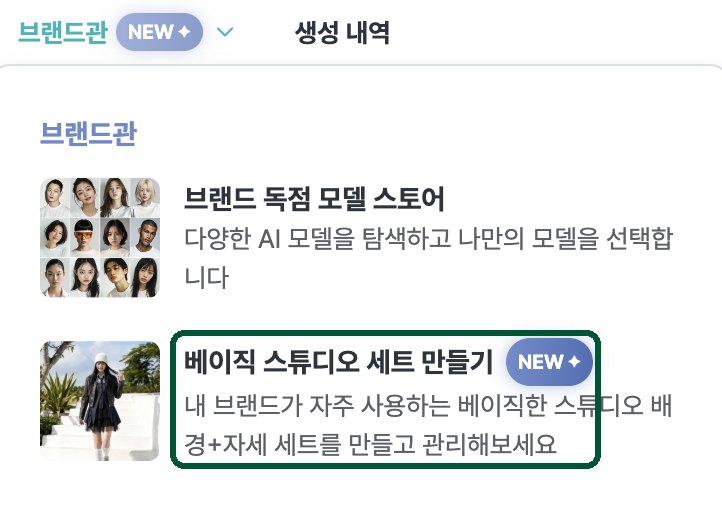
The best part of this feature - once you make it, it stays, and nobody else sees it — it is yours alone. A registered background is saved under the [🔒 Brand Exclusive] filter on the Style Shot background screen, so from your next shoot on you just pick it.
It fits especially well in these situations.
- You have a store or showroom, but booking a shoot every time you need cuts is a lot to carry
- You want your brand feed to stay in the same tone
- You want to continue the lookbook you have shot in the same spot, in the same composition, every season
01 · SetA background and its poses, kept as one set
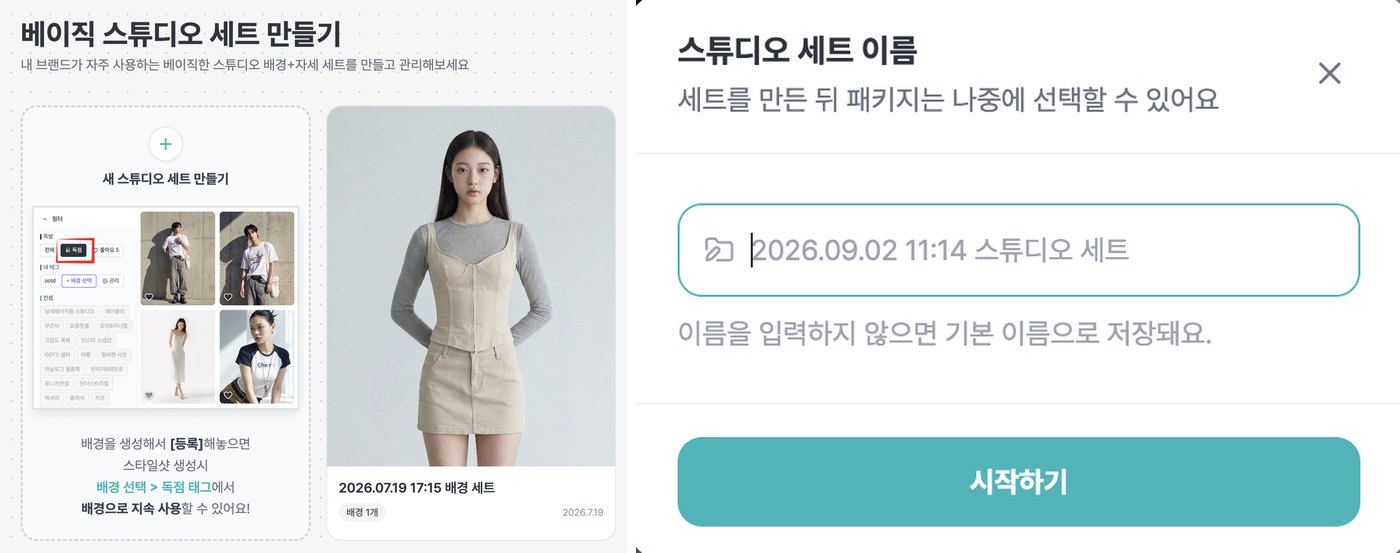
A studio set is one unit that holds a background together with the poses you will use in it. You can name the set, or leave it blank and it will be saved with a date-based default name.
The fact that space and pose are handled together inside one set says a lot about what this feature is for. You try several poses in the same space, then pick the cuts that match your brand feel and the mood of your clothes and register them as backgrounds.
If you have several spaces, splitting them into separate sets makes them easier to find later — one set for the store, one for the showroom. The list shows how many backgrounds each set holds on its card, so you can see at a glance how far you have filled each space.
02 · SourceTwo ways to start
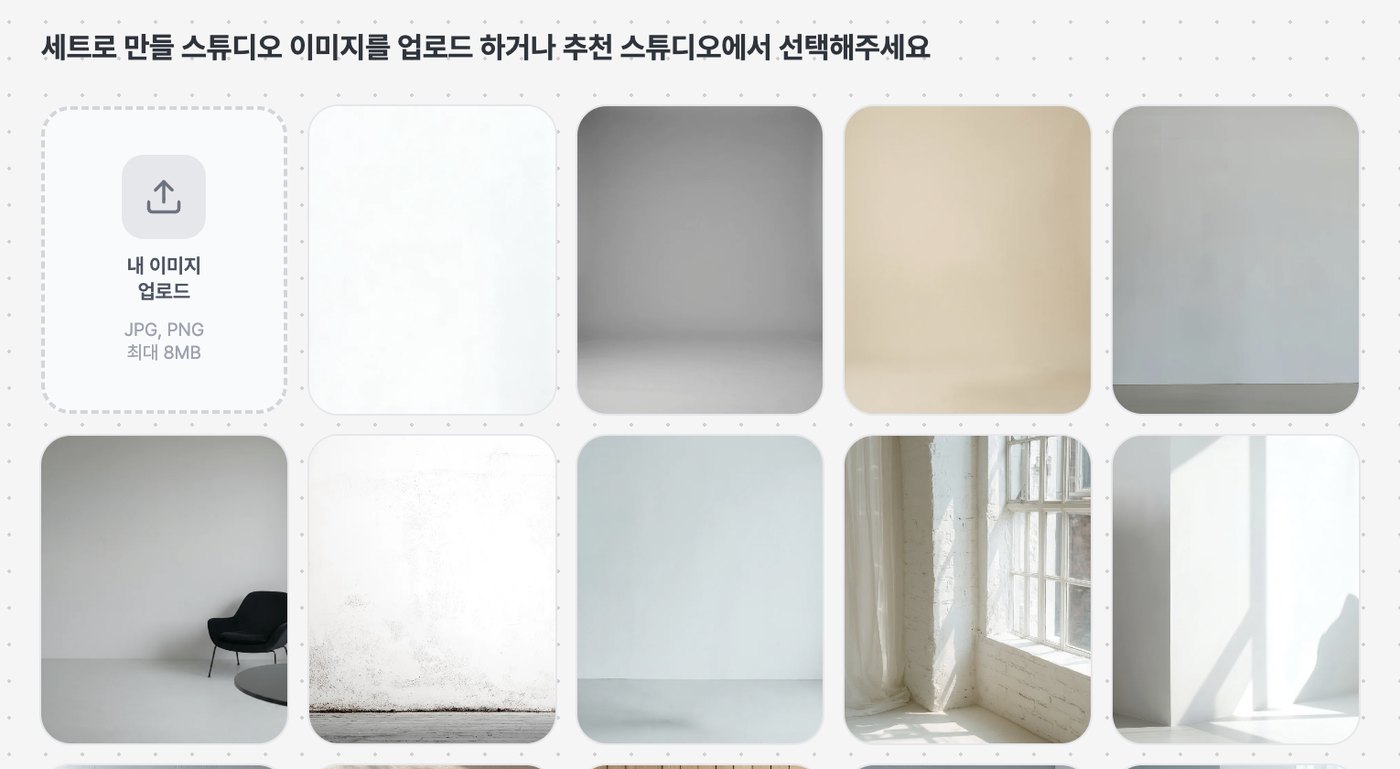
The first screen opens both paths side by side. Start with whichever fits your situation.
- Upload my image — upload a photo of your store or showroom. JPG·PNG, max 8MB. (It does not have to be indoors. Any place you shoot regularly, or want to keep using, is enough.)
- Choose from recommended studios — for when you do not have a photo of your own space yet. Pick one of the studios StyleRoom has prepared and it becomes your brand's studio set as it is. These are the very basic backgrounds most sellers ask for, so building one set from them will serve you well as a default.
When you upload your own image, StyleRoom starts reading the background, the lighting and the mood in it. This usually takes 1–2 minutes, and the screen shows "Analyzing uploaded background" while it runs. You can pick your poses first while you wait, so the moment the analysis finishes you can move straight on.
03 · PackChoose a pose pack first
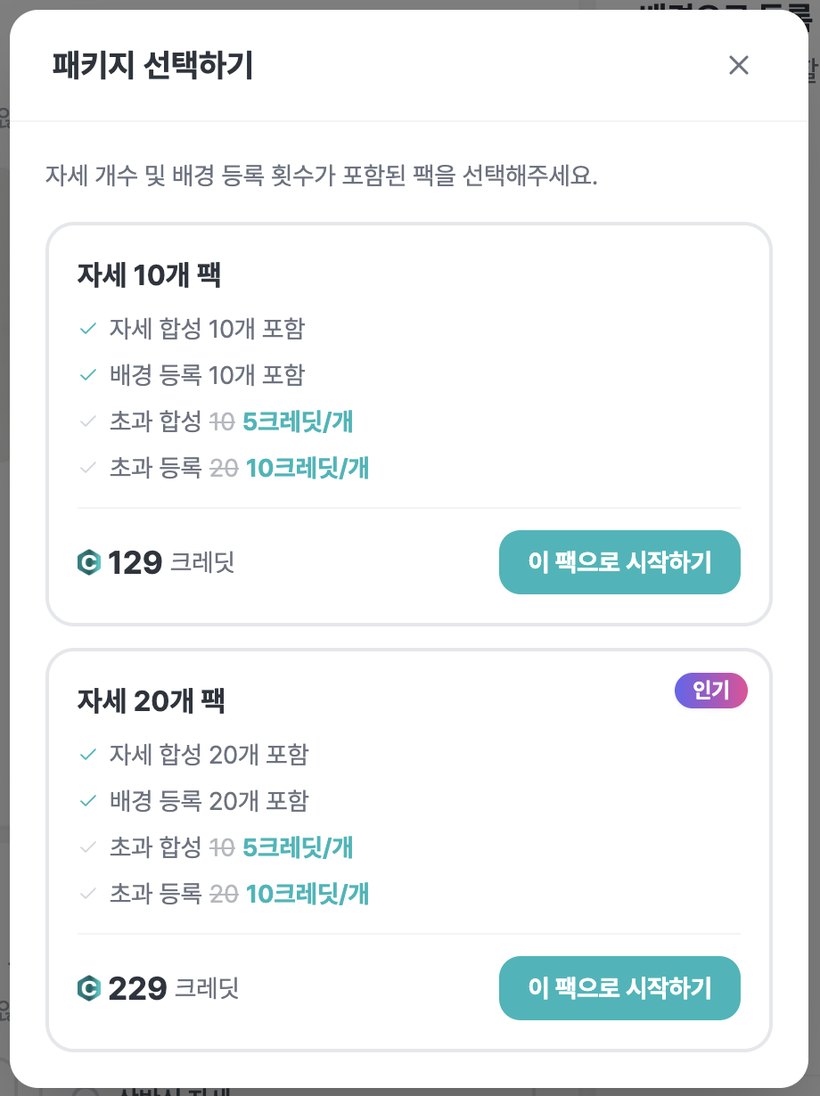
When you go to pick a pose, the pack window opens first. This is where you decide how many times you will generate and how many backgrounds you will register in this set.
Your allowance comes with the pack you choose at the start - a pose pack gives you the same number of pose generations and background registrations. Within what the pack covers, buttons show [Free], and what is left is always on screen as Generation remaining · Registration remaining.
04 · PoseTwo ways to set the pose
Once the background is set, you decide how the model stands in it. There are two ways to do that as well.
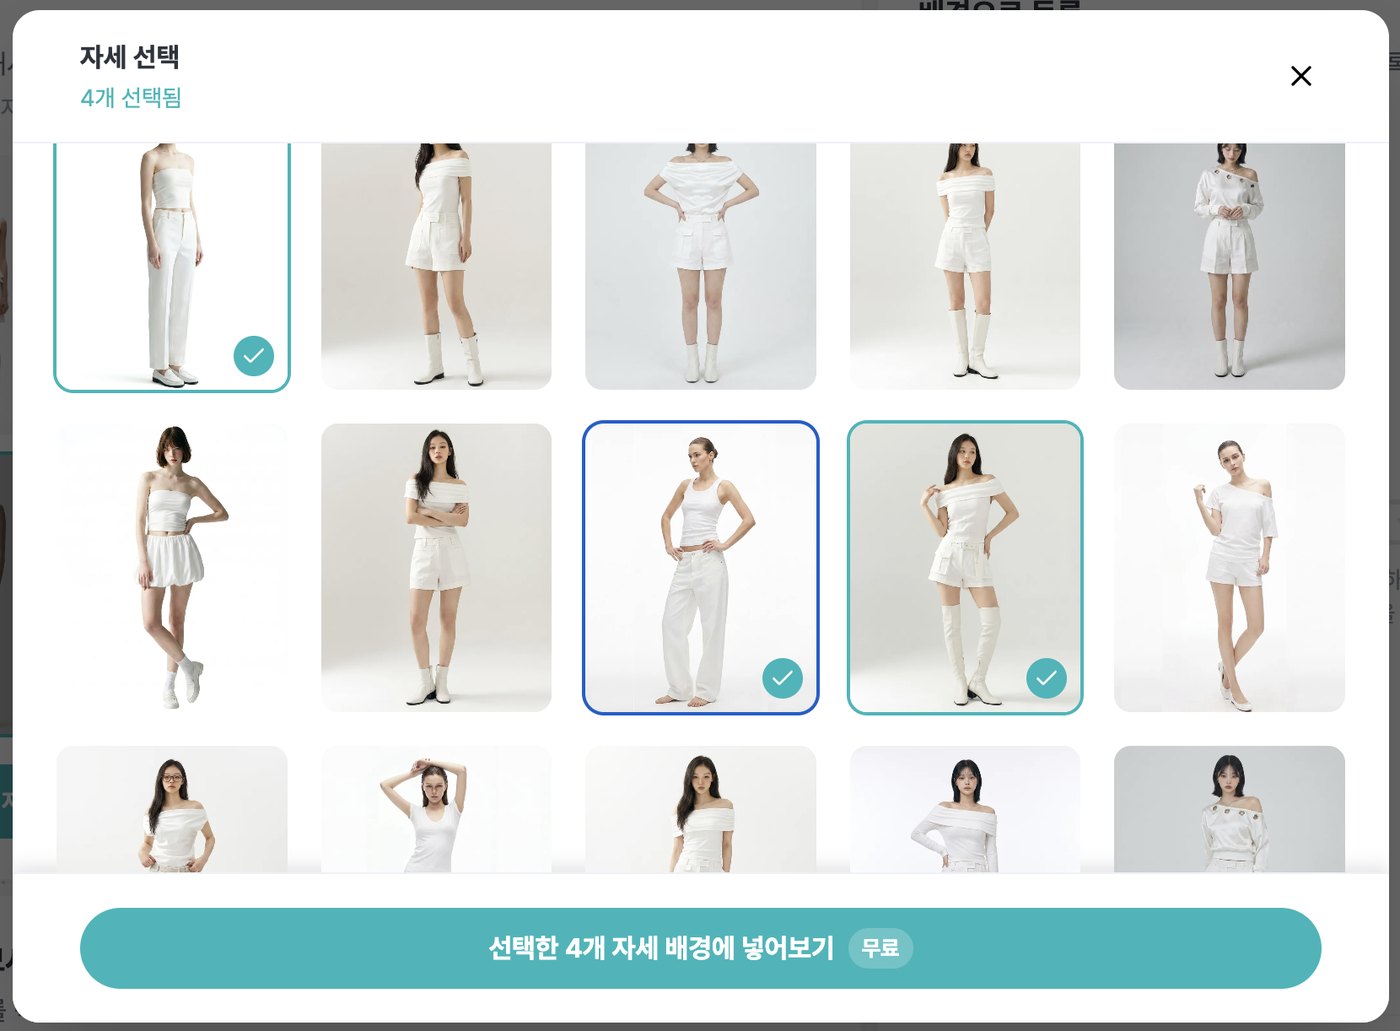
- Select Pose — pick from the prepared pose cards. Select several at once and get them all applied to the background together.
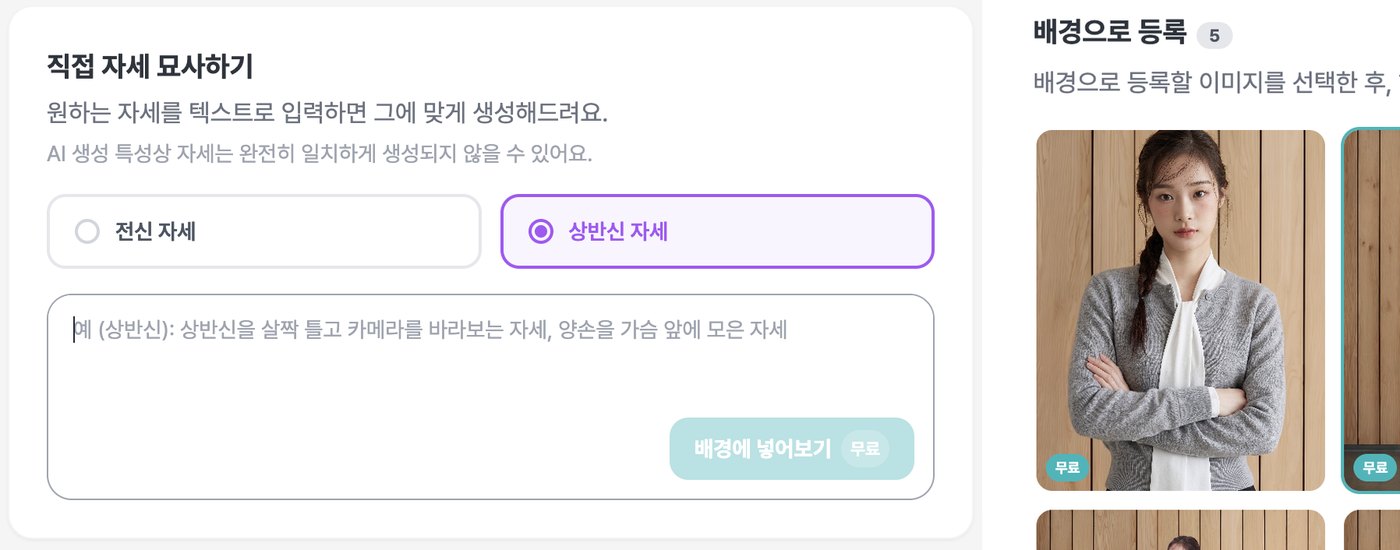
- Describe a Pose — write the pose you want in a sentence. Choose Full body pose or Upper body pose first and it will be generated within that frame. Something like "one hand on the hip, looking straight at the camera."
When to use which - pose cards are quicker when you are filling in the everyday cuts you will use in this space. Describe a Pose is more precise when you have a signature pose you always use in your lookbook. Mix the two freely — they stack up in the same set.
05 · FittingChoosing which garment to see it on
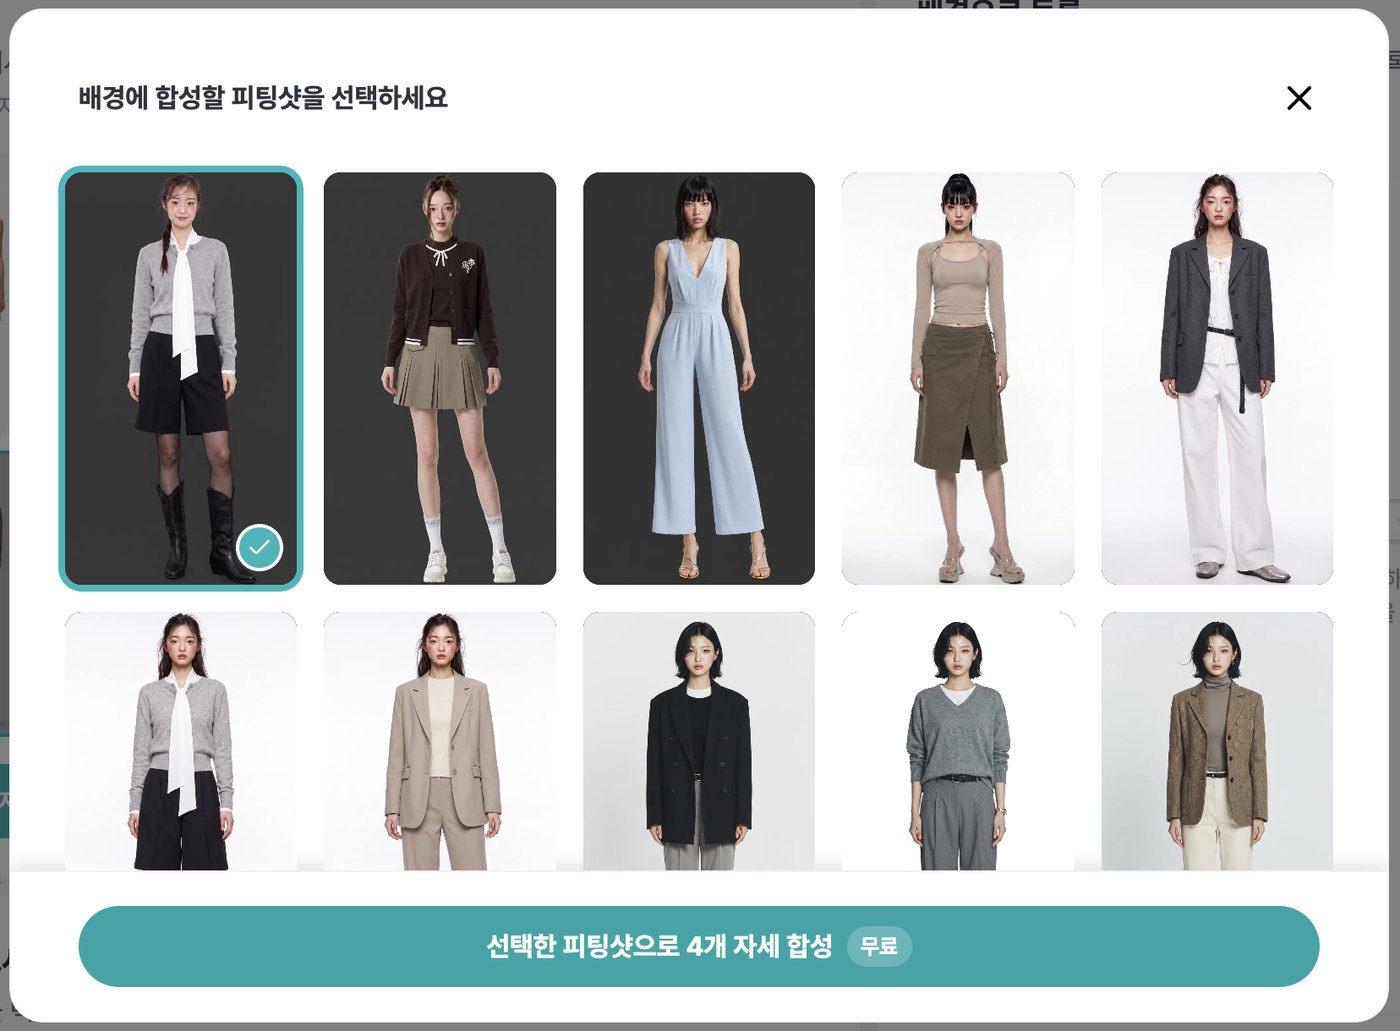
After you pick a pose and run it, the Fitting Shot window opens. This is where you decide which garment to stand in the background, and you pick from the Fitting Shots you have already made. If you do not have one yet, you can make one first from the Style Shot menu, or use the fitting model samples StyleRoom provides.
We recommend fitting one flagship product first. It tells you immediately how the background and pose you chose look when your own clothes meet them. As you know well, the same background needs a different pose for trousers than for a skirt, and the mood has to shift each season.
06 · RegisterRegister the cuts you like as backgrounds
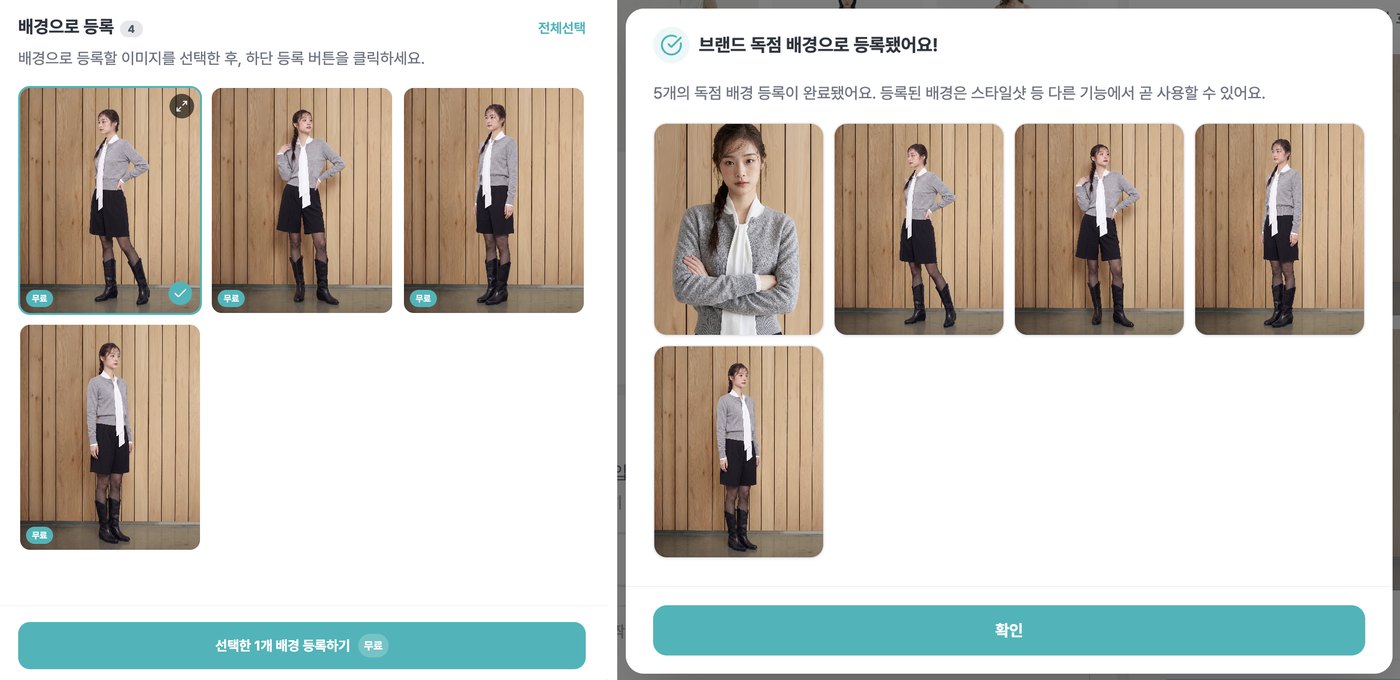
Results stack up in the [Register as Background] panel on the right. Pick the ones you like and register them, and from that moment they are brand-exclusive backgrounds.
Select several at once or register them one at a time. When you are done, a "Registered as brand-exclusive backgrounds!" confirmation appears and shows you the cuts you just registered together.
07 · ReuseIt really starts from your next shoot
This is the heart of the feature. Once you have registered your backgrounds, select the [🔒 Brand Exclusive] filter on the Style Shot background screen. Only the backgrounds you registered gather there. They are not mixed into the shared background list. Your brand's backgrounds live inside the exclusive filter alone.
One note — right after registering, a background may show as Generating for a moment. That is the step that finishes it for use as a background, and it moves into the list on its own when it is done.
You can also check the studio backgrounds you own any time under My Page → Plan Management → Brand Asset Purchase History. Brand-exclusive models sit in the same place. A model is an asset you bring in from the marketplace; a background is one you make yourself, like this. With both in hand, the model and the space are your brand's.
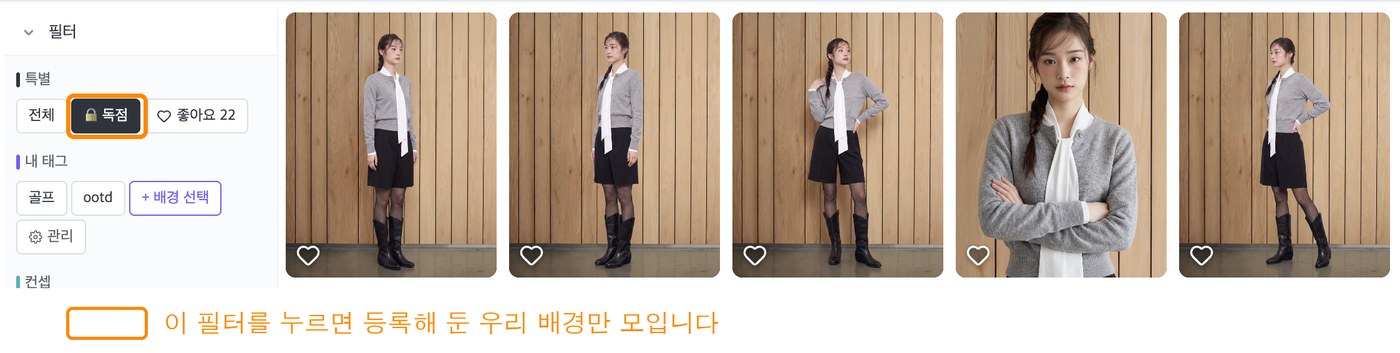
Why an exclusive background helps - you stop picking a background from scratch every time. Seasons change, the person in charge changes, and picking the same background from the same tab keeps your product pages in tone by itself. It does a lot to hold one consistent thread in your brand image over time.
08 · TipsGetting better results
If you upload your own image, shoot the studio with nobody in it. The cleaner the cut and the better the space and lighting read, the cleaner the background comes out.
One space per set. You can swap the studio photo within a set to try things, but if you have several spaces, separate sets are easier to manage.
Register once you see the direction you like. As the screen says, "Due to the nature of AI generation, poses may not match exactly." Running several poses at once and registering the good ones is the flow that works best.
Brand-exclusive backgrounds are made on the Premium plan. Because the asset belongs to your brand alone, this feature is available from Premium up.
ClosingA background becomes an asset
Building a Basic Studio Set for your brand changes the starting point of every AI lookbook you will make into something of your own. Register your studio once and every cut you make afterward can start in the same space.
One photo, a few poses, and registration. Those three give your brand a background of its own.
More Shots From One Garment