One garment needs a lot of images. Six to ten for the product page, three or four for an Instagram feed. One hero shot will not cover it.
StyleRoom splits the job of getting more shots out of one finished image into four separate features. You can move only the camera, shuffle only the pose, write the pose you want, or change both at once. Pick whichever matches the shot you need right now.
Here is what each one holds fixed, what it changes, and when to reach for it.
01 · MenuWhat is in the Style Edit menu
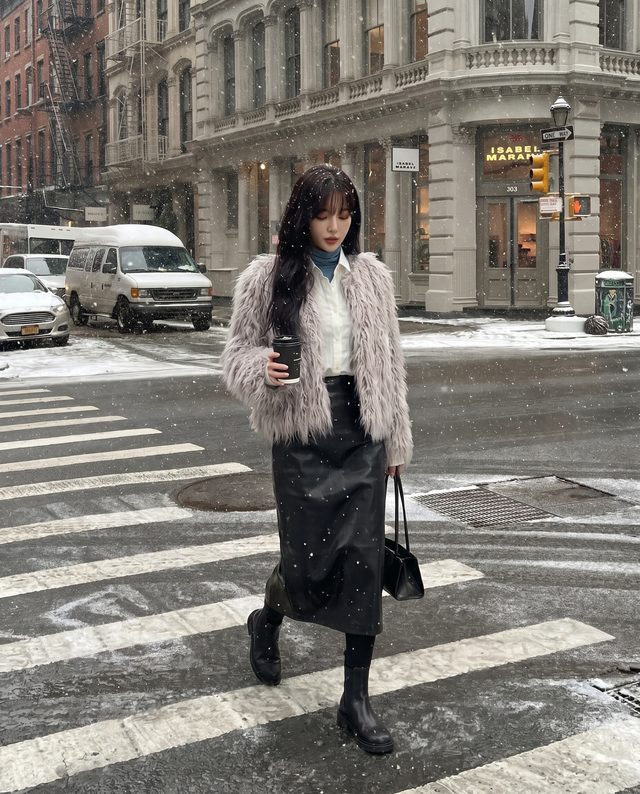
Open Style Edit and you get five features. The names are meant to tell you what changes.
| Feature | What it does |
|---|---|
| Color Variation | Vary the color of the selected clothing as desired |
| Random Pose Change | Keep the angle fixed and randomly change the model's pose |
| Prompt Pose Change | Keep the angle fixed and change the pose with 3 prompts you write yourself |
| Change Angle Only | Keep the pose fixed and change the shooting angle |
| Different Angle, Different Pose | Change to a different angle and pose while preserving the background mood |
Color Variation works on the garment itself, so it sits a little apart from the rest. This article covers the other four, the ones that deal with pose and angle.
The short version. The four differ in what stays fixed. Change Angle Only holds the pose and moves the camera (5 images). Random Pose Change holds the angle and shuffles the pose (5 images). Prompt Pose Change holds the angle and follows the poses you write (3 images). Different Angle, Different Pose moves both and keeps only the mood of the background (5 images).
02 · OverviewChoosing by the shot you need
Two things decide it: whether the camera moves, and whether the model does. The four features are the combinations, which means you change exactly as much as you need and no more.
| Feature | Angle (camera) | Pose (model) | Images | How much you steer |
|---|---|---|---|---|
| Change Angle Only | Moves — you set it | Fixed | 5 | Precisely, with sliders |
| Random Pose Change | Fixed | Moves — at random | 5 | Left to chance |
| Prompt Pose Change | Fixed | Moves — you write it | 3 | Three sentences |
| Different Angle, Different Pose | Moves | Moves | 5 | Left to chance (mood kept) |
Prompt Pose Change takes three written poses and returns three images. The other three give you five in one go.
One line. Change the angle when you need to show fit. Change the pose when you need mood. Use a prompt when the shot is already in your head, and change both when you simply need more images.
03 · AngleChange Angle Only - the pose stays, the camera moves
The model holds still and the photographer walks around them. Reach for this when you need to show silhouette and fit from several directions.
Three sliders do the work.
The three axes
Horizontal rotation — starts at the front (0°), passes the right side (90°), the back (180°) and the left side (270°) for a full turn.
Vertical angle — low angle at −30°, eye level at 0°, bird's eye at 90°. Looking up lengthens the legs; looking down makes the face smaller.
Zoom — wide at 0, medium at 5, close-up at 10. This is what decides between a full-body and an upper-body shot.
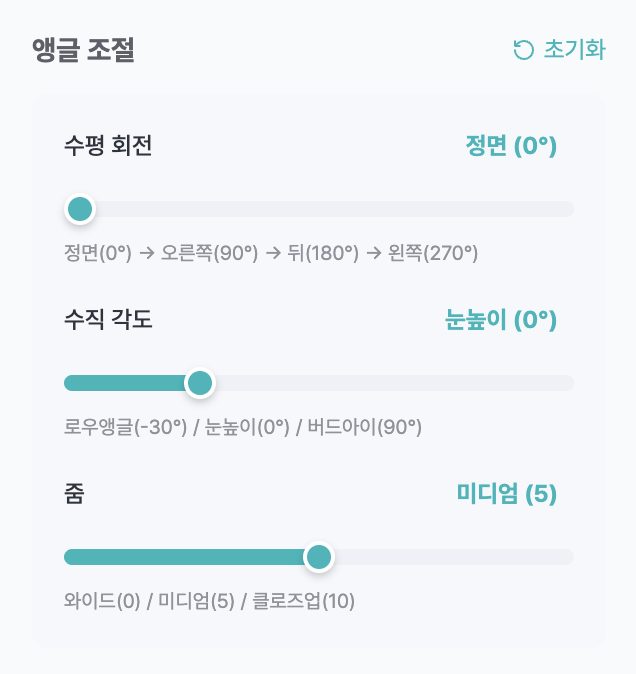
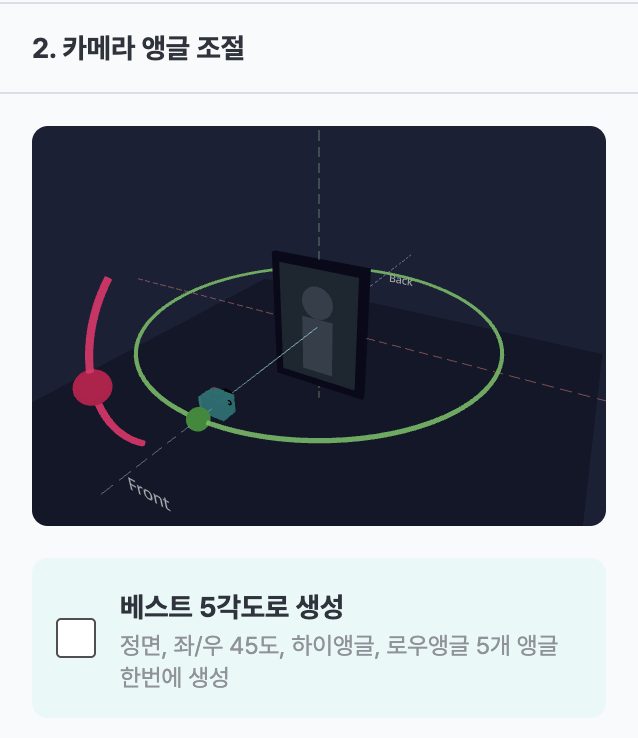
Set the three sliders yourself, or tick "Generate with best 5 angles" and get five at once. On the right, results generated across a range of angles.
If touching three sliders every time is a chore, Generate with best 5 angles does it for you: front, left and right 45°, high angle and low angle in one run. That covers most of a product page's base set.
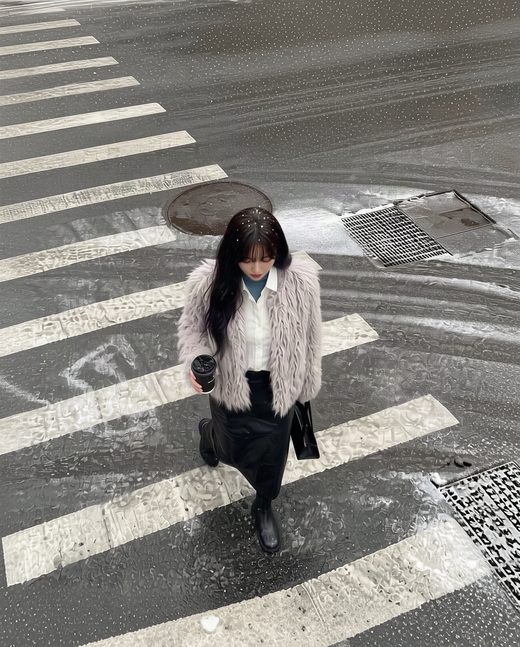
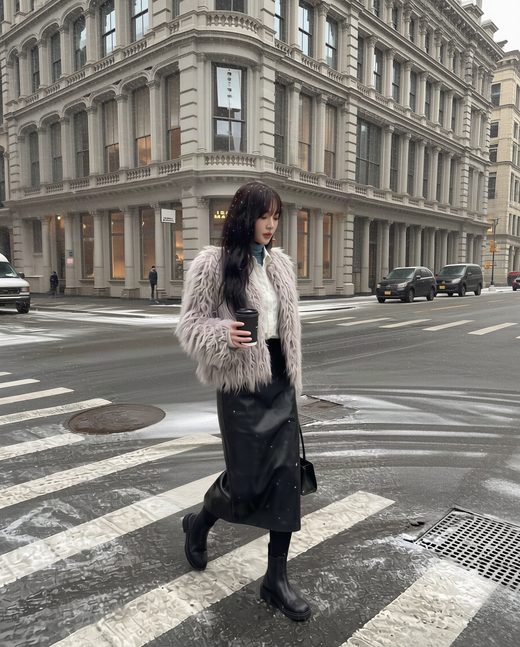
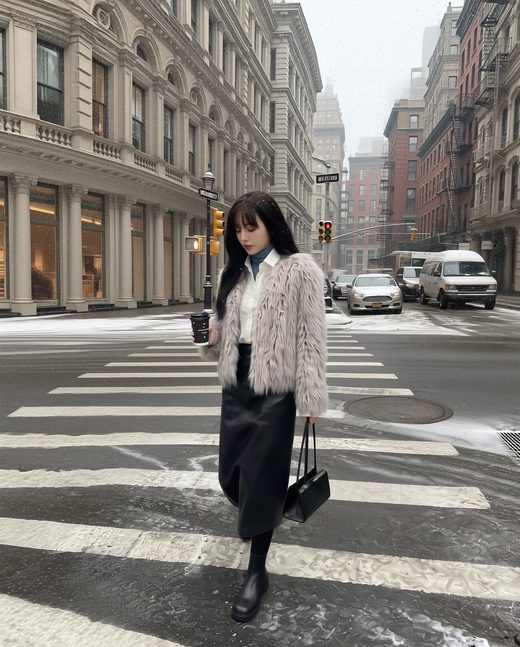
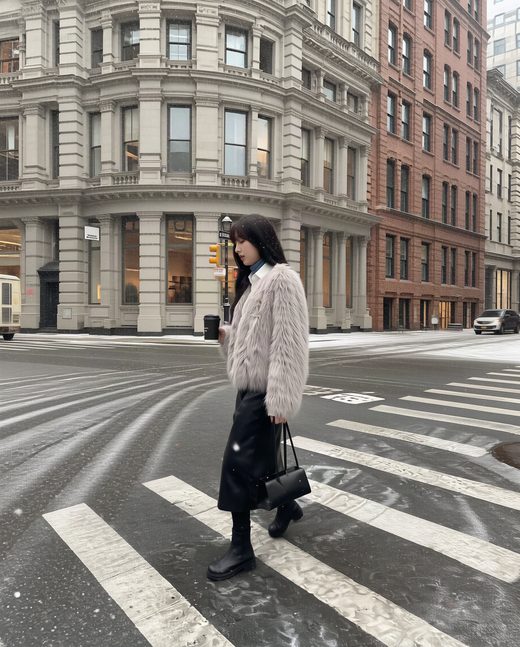
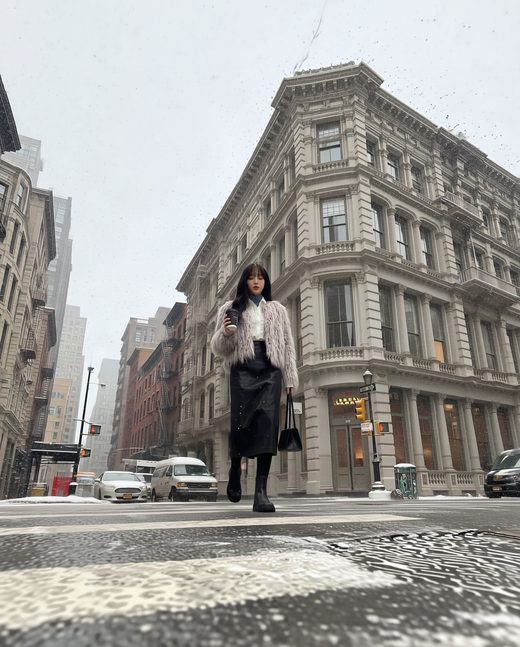
Five images with the pose and the background untouched and only the camera moving, from looking down at the subject to standing well back.
Reach for it when you need the shoulder line and length of an outerwear piece, the back of a dress, or a shoe or bag whose shape changes a lot with the angle. How a garment falls only comes across when you show it from more than one direction.
04 · PoseRandom Pose Change - five poses at the same angle
The camera stays put and only the model moves. The screen puts it plainly: "Keep the angle fixed and generate 5 images with randomly changed model poses."
Pick a source image, press generate, done. There is nothing to fill in, which makes it the fastest of the four. Good for when you do not yet know what you want and would rather lay the options out and choose.
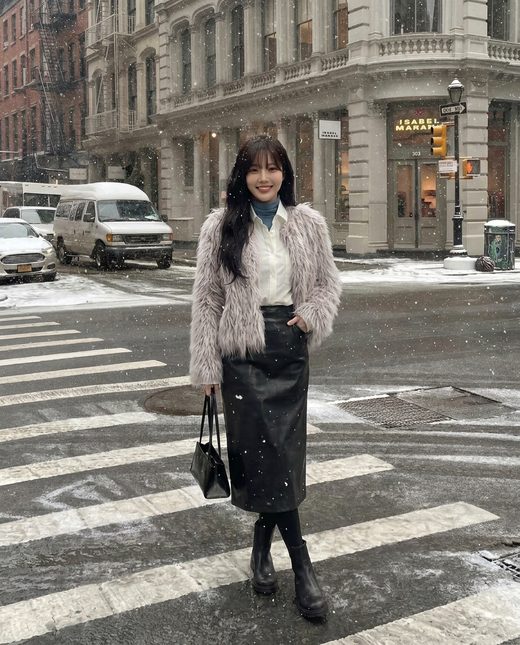
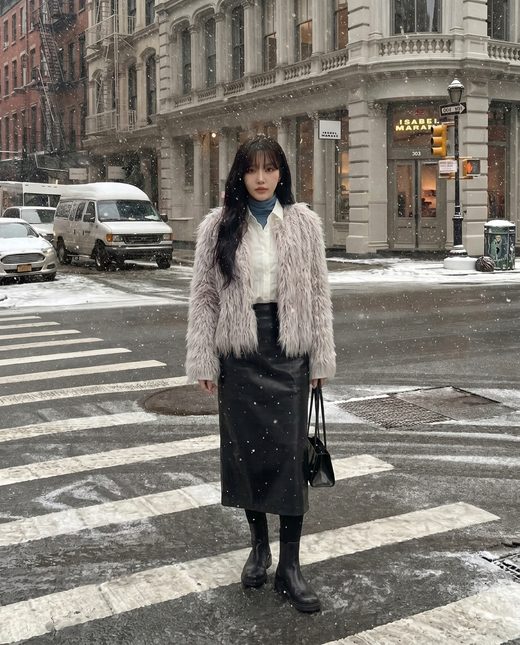
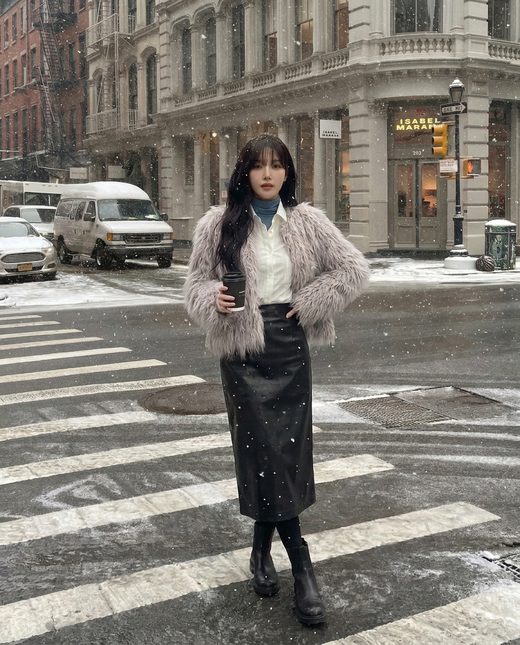
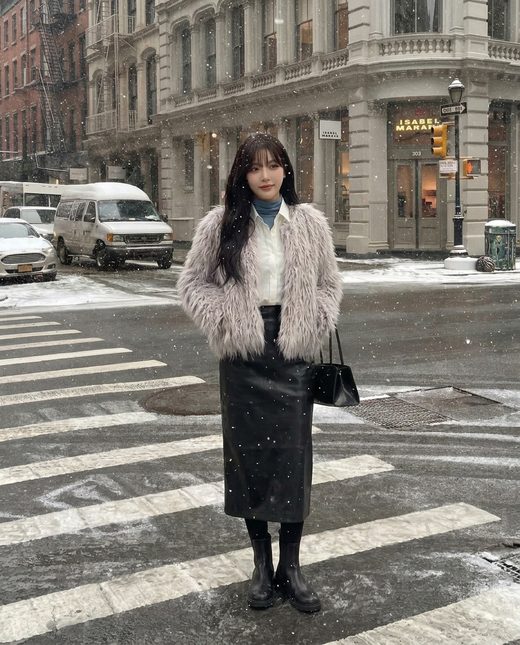
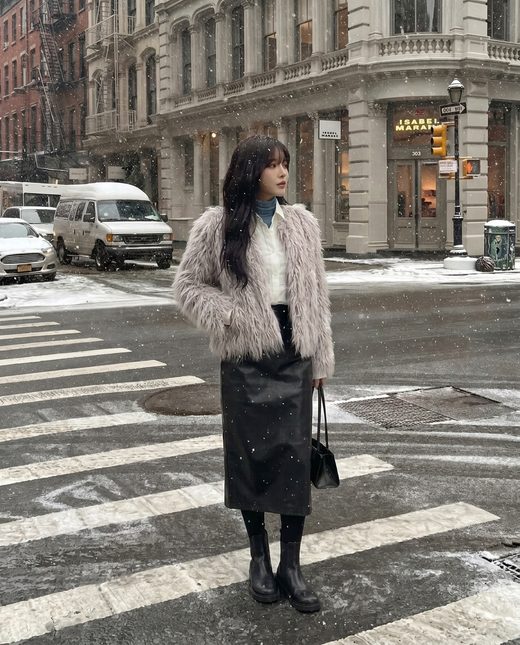
The camera position and the background are identical, so these sit side by side in a feed without breaking the tone.
Reach for it when you need a row of an Instagram feed in one tone, a few mood shots for the middle of a product page, or a set of candidates to choose a hero shot from.
You get five at once and keep the ones you like, so it works best when you want a generous set to choose from.
05 · PromptPrompt Pose Change - write the pose you want
For when the pose is already decided. The angle stays exactly where it is and you describe the pose in a sentence.
Input
All three pose prompts have to be filled in before it runs. Each takes 1 to 500 characters. You get one image per prompt, three in total.
The placeholders on screen read: "Standing with arms crossed", "One hand in a pocket", "Body turned to the side".

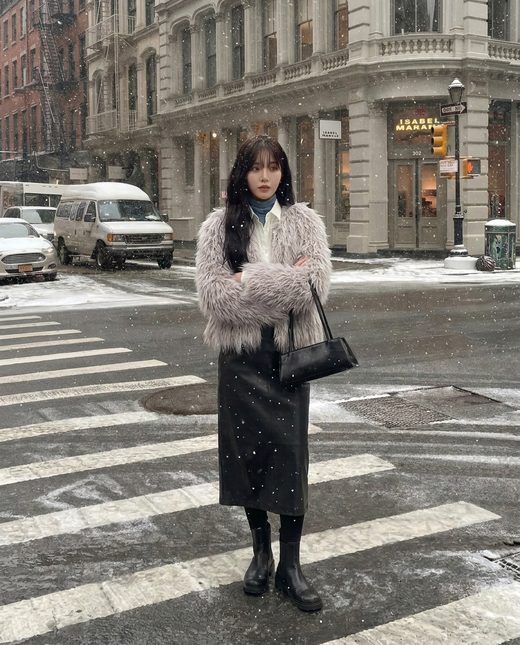

Three images from three prompts. The angle is untouched and only the pose you described changes.
Writing prompts that land
Name the body part. Say what the arms, hands, shoulders, gaze or legs are doing and that is what you get. "One hand in a pocket, the other relaxed at the side, looking at the camera" beats "a relaxed pose".
Use the fact that the angle is fixed. The camera does not move, so writing "as if shot from the side" will not change the angle. Describe the model turning instead: "turned 45 degrees with the face to the camera".
Treat the three as one set. Give each of the three a different job and a whole section of the page fills itself: one still, one with movement, one that shows detail.
Check that the garment stays visible. Folded arms cover the front of a top, and a hand in a pocket changes the line of the bottoms. Decide which part you are selling before you pick the pose and the choice gets easy.
Credits come back if it fails. When a run fails outright, the screen tells you the credits will be refunded automatically within a few minutes. That is why it is worth trying the bolder prompt.
06 · BothDifferent Angle, Different Pose - both change, the mood stays
Angle and pose both change, and the mood of the background carries over. Five images.
Use it when the result needs to look like the shoot simply continued in the same place. Because it moves the angle and the pose together, it gives the widest spread of the four.
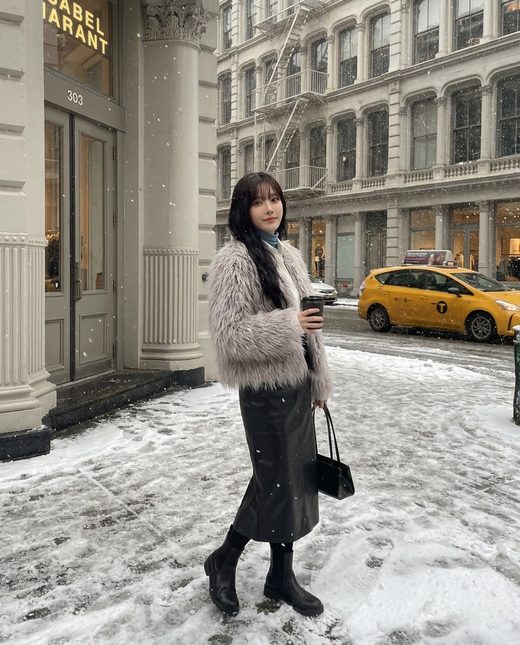
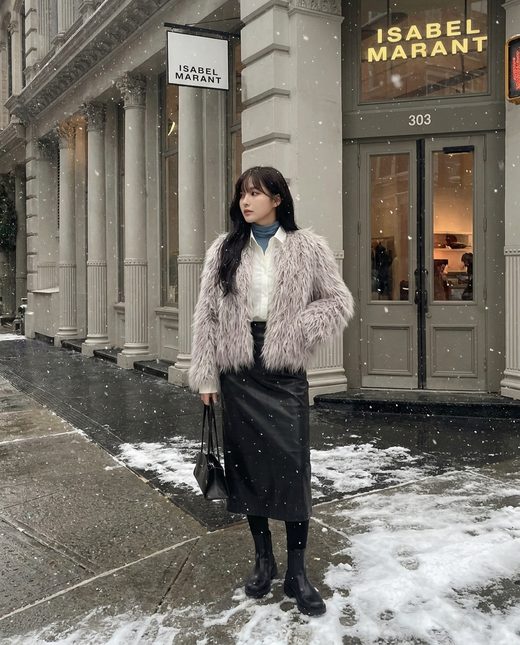
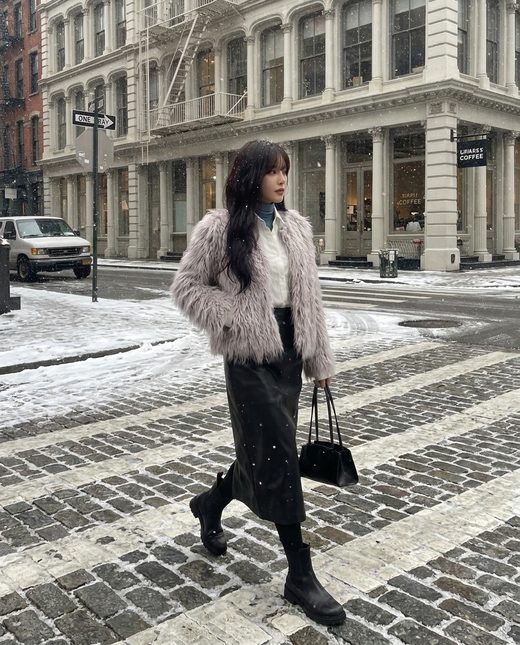
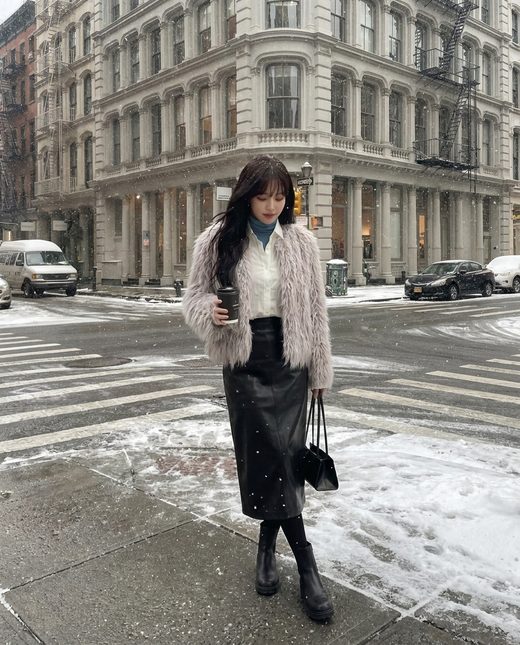
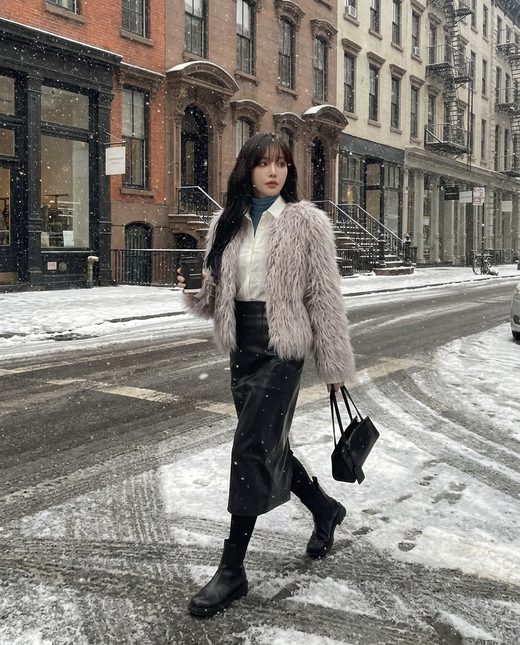
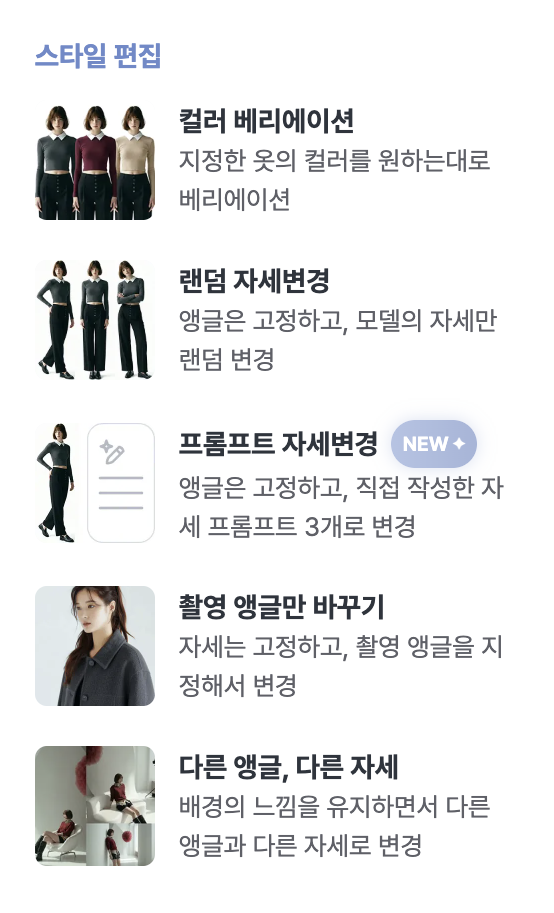
The angle, the pose and even where the model stands have all moved, and the snowy-street mood carries straight through.
Reach for it when you need a lookbook that flows across several images, want to pull as many shots as possible out of one background, or need a pool of candidates for ad creative.
If a specific angle or a specific pose is non-negotiable, Change Angle Only or Prompt Pose Change will serve you better.
07 · DecisionWhat to pick, by situation
Find the row that matches this batch.
| Situation | Pick | Why |
|---|---|---|
| Filling the base set of a product page | Change Angle Only → best 5 angles | Front, left and right 45°, high and low in one run. Carries the most fit information |
| A row of an Instagram feed in one tone | Random Pose Change | The fixed angle keeps the feed tidy |
| The shot is already in your head | Prompt Pose Change | Describing it beats leaving it to chance |
| You just need more images | Different Angle, Different Pose | The widest five in a single run |
| You need the back or the side, specifically | Change Angle Only (90° / 180°) | The others do not guarantee a particular angle |
| Returns keep mentioning the fit | Change Angle Only + close-up zoom | Shows silhouette and fabric at once |
| Choosing a hero shot from candidates | Random Pose Change, then pick | Built for choosing from a set |
An order that wastes less
Say a new garment has landed. Start with Change Angle Only and the best 5 angles to secure the base set, then pick the single best image out of it. Run Random Pose Change on that one to get five mood shots and keep the ones that work. If gaps remain, fill them precisely with Prompt Pose Change and its three images.
What matters in this order is taking the best image as your source. The better the source, the better everything you pull from it.
08 · TipsGetting better results
A pose moves toward the sentence you wrote without landing on it exactly. StyleRoom says as much on the screen: "Due to the nature of AI generation, poses may not match exactly."
So Prompt Pose Change works better as a way of narrowing in than as a one-shot. Look at the three you get back, tighten the sentence toward the closest one, run it again, and you land on the shot quickly.
Sometimes a small detail like the fingers or fine embroidery does not come out quite right. When that happens you do not have to rebuild the whole image — you can fix just that part. That is Vol.02 of this series.
In closingDecide what stays fixed and the rest follows
All you need to settle is whether the camera or the model stays put this time. The menu narrows itself from there.
Fix the camera and you are in the pose features; fix the model and it is Change Angle Only. Let both go and it is Different Angle, Different Pose. If the shot is already in your head, use a prompt instead of the random draw.
Because it is split four ways, you change only as much as a given shot needs — and one garment ends up with an image that suits every slot on the page.
More Shots From One Garment