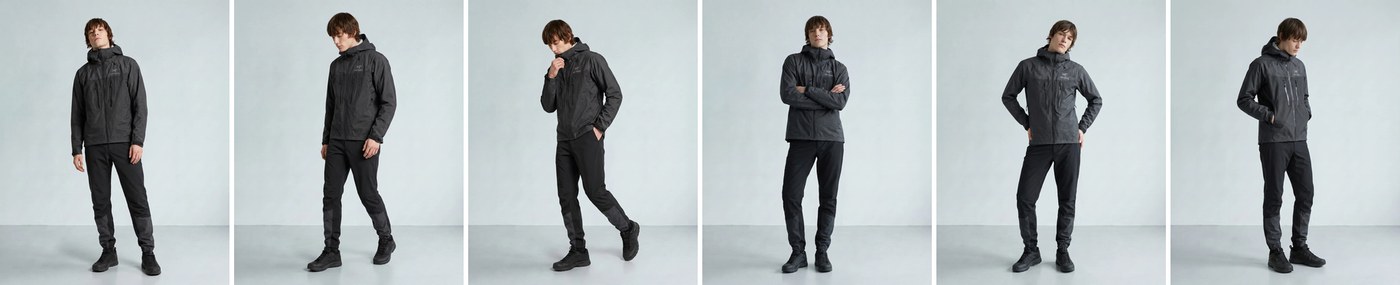
Open almost any product page and the first shot is a model standing against a plain background. Wall and floor curve into each other with no visible seam — that is why it is called a horizon. In a photo studio you get it by sweeping a paper roll down and out.
The reason it earns that first slot is simple. Only the garment is visible. With nothing behind it, the customer's eye goes straight to the product, and colour, fit and length all read accurately. Whatever category you sell, one horizon cut is close to mandatory.
Two routes in StyleRoom - pick one from the horizon backgrounds already prepared, or build your own by combining the colour and pose you want. If you will be using it often, the second is easier.
01 · PickRoute one — choose from the background tags
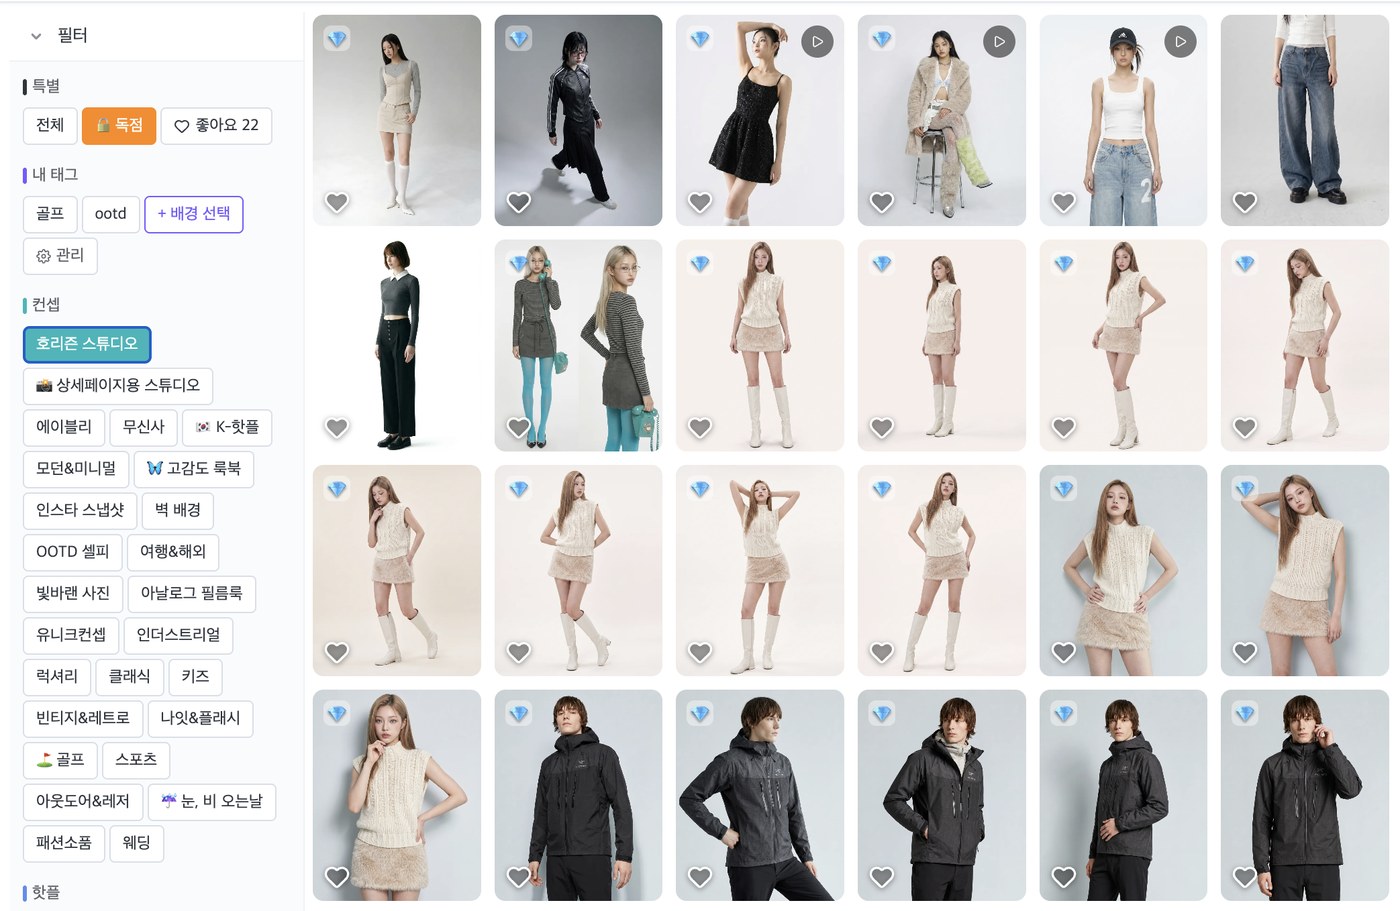
The quickest way. When you are making a Style Shot, on the background screen press the [Horizon] tag. It sits at the very top of the concept tags.
Right beside it is another studio tag aimed at product pages — slightly more set-dressed than a bare horizon, and ready to use as-is. Try both and go with whichever suits your garment.
One thing matters here: every background comes with its own pose. Standing square to the camera, turned slightly, seated — each is a separate background. So choose the pose that suits your garment.
- Outerwear and dresses, where silhouette matters — squared up to the camera
- Trousers and skirts, where length matters — a full-body pose with the whole leg line visible
- Knits and blouses, where detail matters — a pose framed tighter on the upper body
TIP.
Once you have picked a colour and lighting you like, make a few cuts, choose the one where the garment and model came out best, and run angle and pose variations from it. The AI will find poses and moods you had not thought of.
Save the ones you like - there are two ways. Tap the heart on a background card and it collects under the [Liked] filter on the left. If you have a set combination you use often, grouping them under [My Tags] with a name works better — something like "Horizon White" or "Autumn Lookbook". No more scrolling to find the same background next time.
02 · BuildRoute two — keep your own horizon background
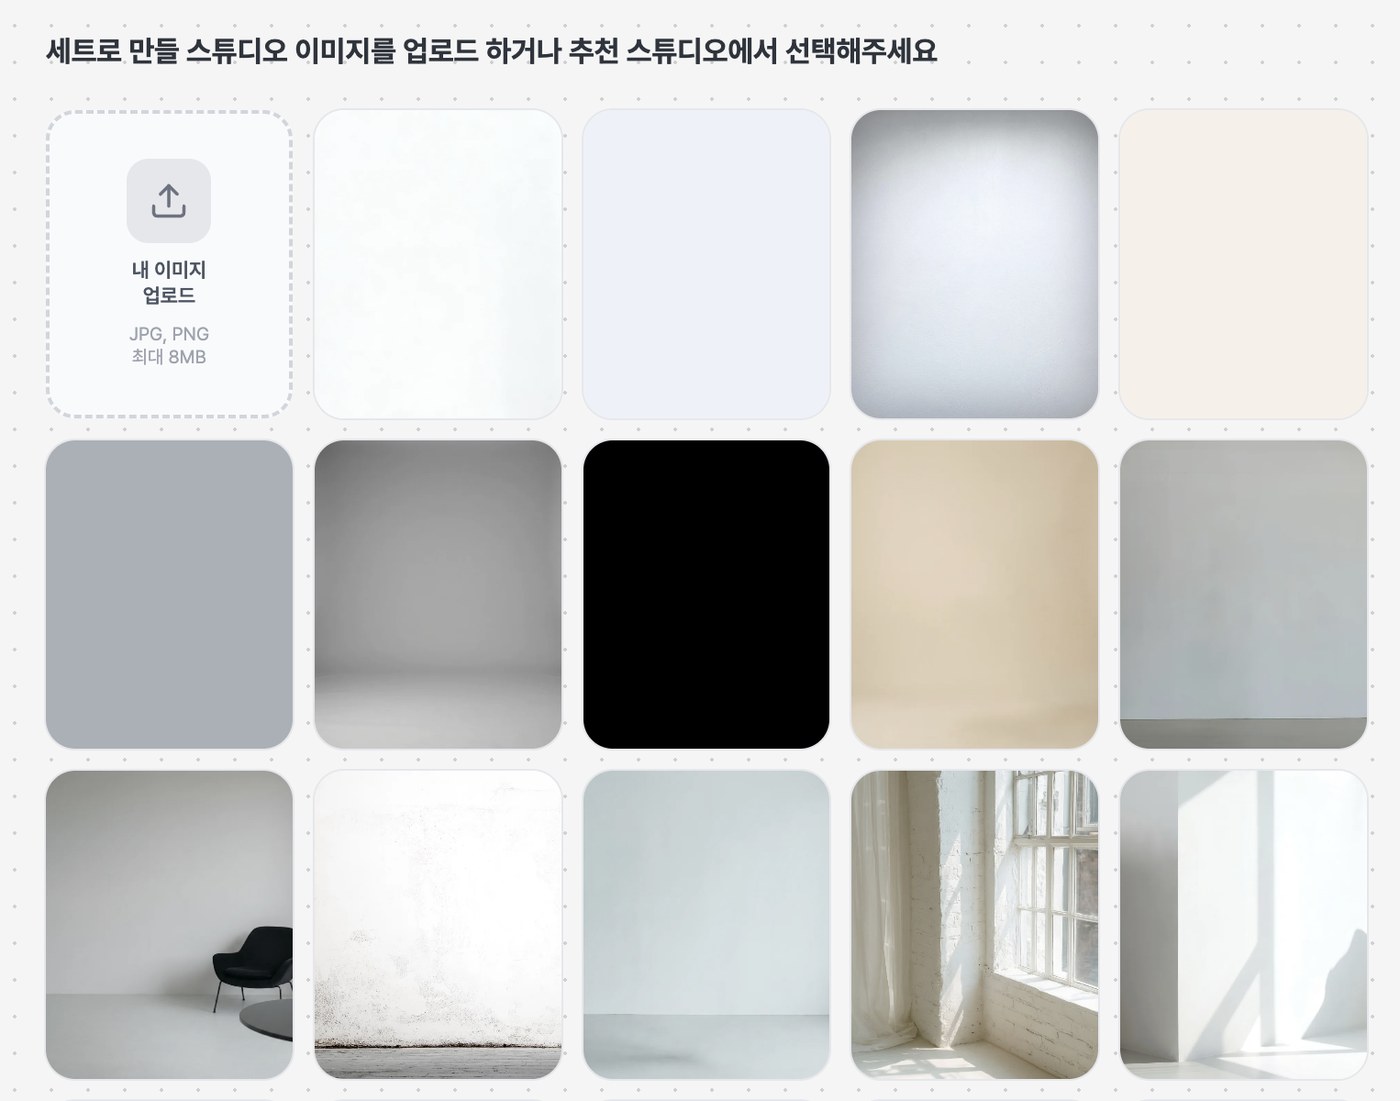
If your brand colour is settled, or you want the same combination every time, building your own studio set is the better move. Go to [Brand Hall] → [Create a Basic Studio Set] at the top.
The opening screen's recommended studios are stocked with horizon backgrounds by colour — white, light grey, ivory, beige, soft blue and more. Pick the one that matches your brand tone, then lay the pose you want on top of it.
Once registered, a [🔒 Brand Exclusive] filter appears in the Style Shot background screen, holding your colour with your pose. From the next shoot on, you just pick it.
What this really saves - in a photo studio this would mean swapping the paper roll and resetting. Here you change the colour and make it again. The full walkthrough is in the brand background piece.
03 · CropOne frame, three cuts
Horizon cuts are usually split three ways — full body, upper body, lower body. The full body carries the silhouette, the upper body shows the neckline or sleeve detail, the lower body shows length and fit.
You do not need to generate those three separately. Make one frame at 4K and cut it up. The background is plain, so it holds together wherever you crop, and 4K leaves enough resolution for a product page even after cropping.
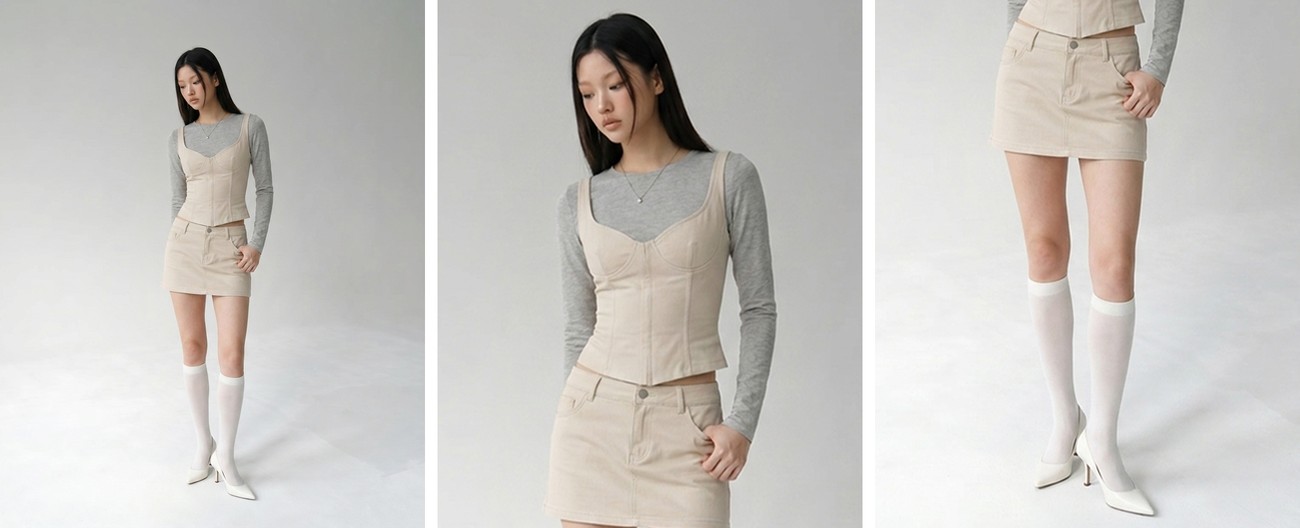
The real gain from cropping is not credits — it is consistency. All three came from the same frame, so the pose, the lighting and every crease in the fabric match exactly. Three separately generated cuts, however carefully matched, can drift apart in small ways.
04 · ColorTry the backdrop colours you never could
This is the part we would most like to recommend.
When you booked a studio, choosing a backdrop colour was a gamble. Half a day of rental, the model's schedule locked in, and if an unfamiliar colour did not land, the day was gone. So most people went with white or light grey. It was safe.
Here that weight is off. Change the colour, make a few, keep the one that suits your garment. A tone close to your brand colour, a tone that fits the season's mood, a tone that will read differently from your competitors — you can check them all on your own clothes beforehand.
If every feed in your category is white, changing one tone is enough to stand out.
ClosingStart with the basics, and make them yours
A horizon studio shot is not a showy cut. But it is usually the cut the customer judges the product on, because with an empty background the garment stands on its own.
Pick from what is prepared, or keep one in your own colour. Add the habit of making one 4K frame and splitting it three ways, and a whole product page gets noticeably easier.
The more basic the cut, the longer it pays to make it yours.