StyleRoom takes a garment photo and a model, produces a fitting shot, and then uses that fitting shot as the reference for styled scene shots. That pipeline runs well today.
Still, two places kept catching as we used it. This is the record of finding one way to close both at once.
01 · Two Gaps
First, to be clear about what already works: back shots have always been available in StyleRoom. You choose front or back at the start of a job, and that choice carries through pose, location, and fit. Upload a photo of the garment's back and the back gets reflected too.
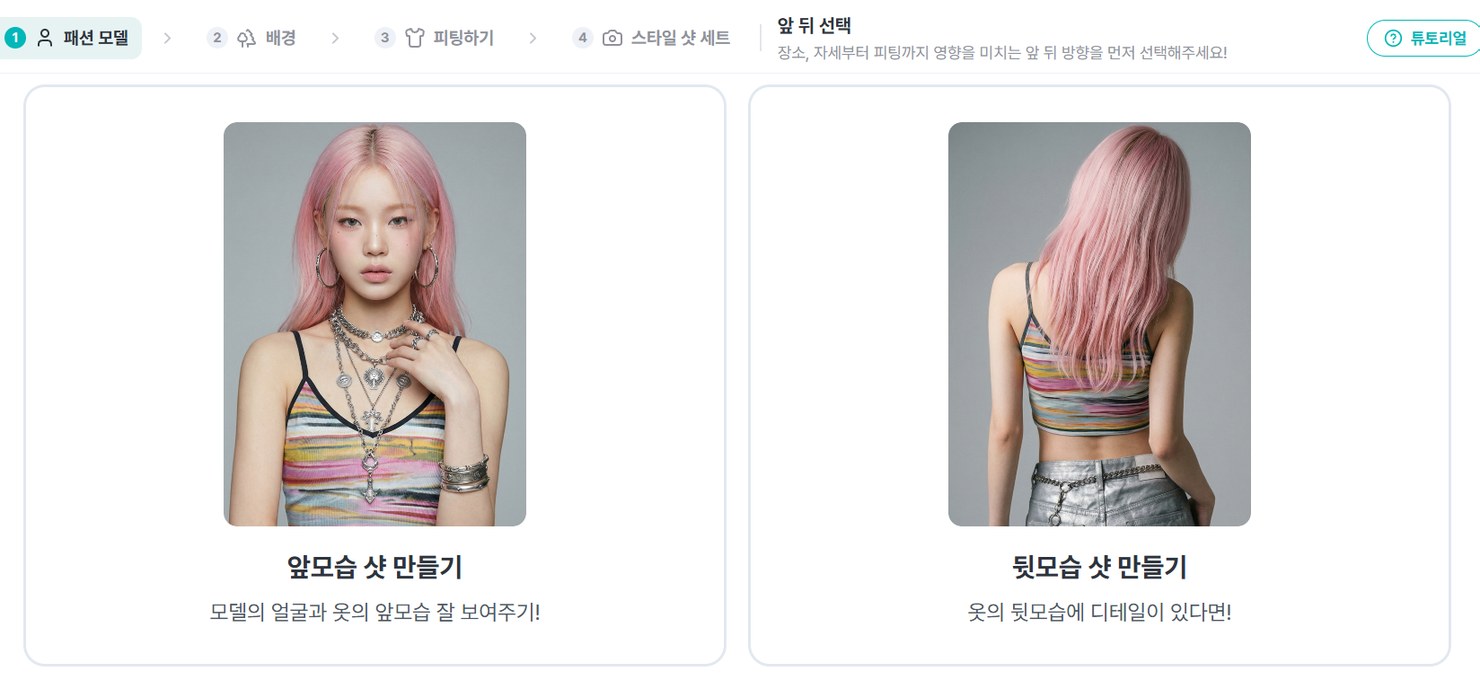
The first step of a job. The path to a back shot was there from the beginning.
And that is exactly where the first gap sits. Front and back have to be made separately. One run for the front fitting shot, another run for the back. The extra work is a nuisance, but the quieter problem is that the two are separate generations. As we wrote in Vol.10, the same input does not give you the same result twice. Pull front and back separately and that variance shows up as a mismatch between the two photos. Nothing in the structure guarantees they are the same person wearing the same garment.
The second gap is the face. Inside a full-body frame, the face occupies less room than you would think, and the model's likeness does not always come through. The numbers are below.
02 · One Sheet
Closing the first gap meant changing direction. Instead of making one view at a time as it is needed, fix all four views up front, in one pass.
Animation studios have something called a character model sheet. One character is drawn from the front, the side, and the back, all gathered on a single sheet, and every shot that follows refers back to it. That is how the character in episode one is still the same person in episode twelve.
We applied the same idea to fitting shots. Once the model and garment are set, front, side, side, and back are produced in a single generation. Two things resolve at once. The four cuts cannot drift from each other because they came out together, and that one sheet serves both front work and back work. There is no longer a reason to make a separate version for each.
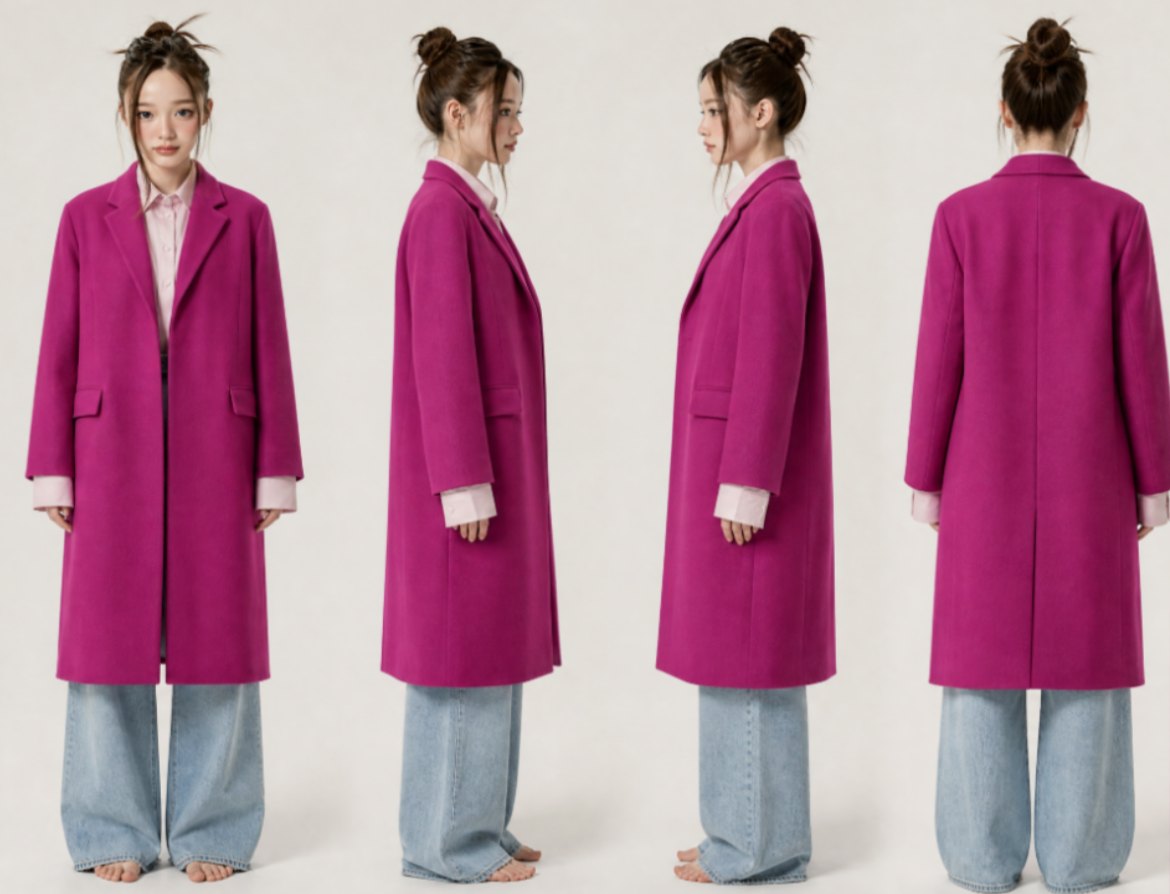
The first attempt. Four directions on one sheet, and the garment and the person agree across all four cuts. That part worked. Look at the faces, though, and the second gap has actually gotten worse.
03 · Nine Percent
Zoom into a face above and it is soft. Run the arithmetic and that is exactly what you would expect.
Put four full-body figures side by side on one canvas and each one gets a quarter of the width. A person is roughly seven to eight heads tall, so the head is about an eighth of the figure's height. Measured on the image above, from hairline to chin, the face comes to about 9% of the image height.
And this is not a problem you can solve with resolution, because a proportion does not care about resolution. Render at 2K or 4K and the face is still 9%, while doubling the whole frame doubles what the generation costs.
The face is also not a place where you can give ground. Almost everything that answers "is this really that model" lives in the face. A slightly different fold in the fabric is forgivable; a different face means the photo gets thrown away. The area that mattered most was getting the fewest pixels.
The problem was not resolution. It was layout.
04 · A Canvas of Its Own
So we split the body from the face. The four full-body cuts show the garment with no head at all, and the face is produced as a separate sheet. A large front face, with side, side, and back beneath it. No garment appears on that sheet. Joined together, the two become the final character sheet.
Showing the garment is all it does.
with side, side and back below.
No garment appears.
gathered into one reference.
The pixel budget changes. On its own canvas the front face takes up about 39% of the image height. From 9% to 39%: more than four times in length, and close to seventeen times the pixels. The overall resolution does not change at all.
when everything shared one sheet
on a canvas of its own
at the same resolution
One thing here matters. We could have simply asked for a bigger face. We tried, and it does not take. An image model decides how large the subject should be on its own, within whatever canvas it is handed. Handing it a separate canvas is far more reliable than asking nicely. Aspect ratio and canvas are composition instructions.
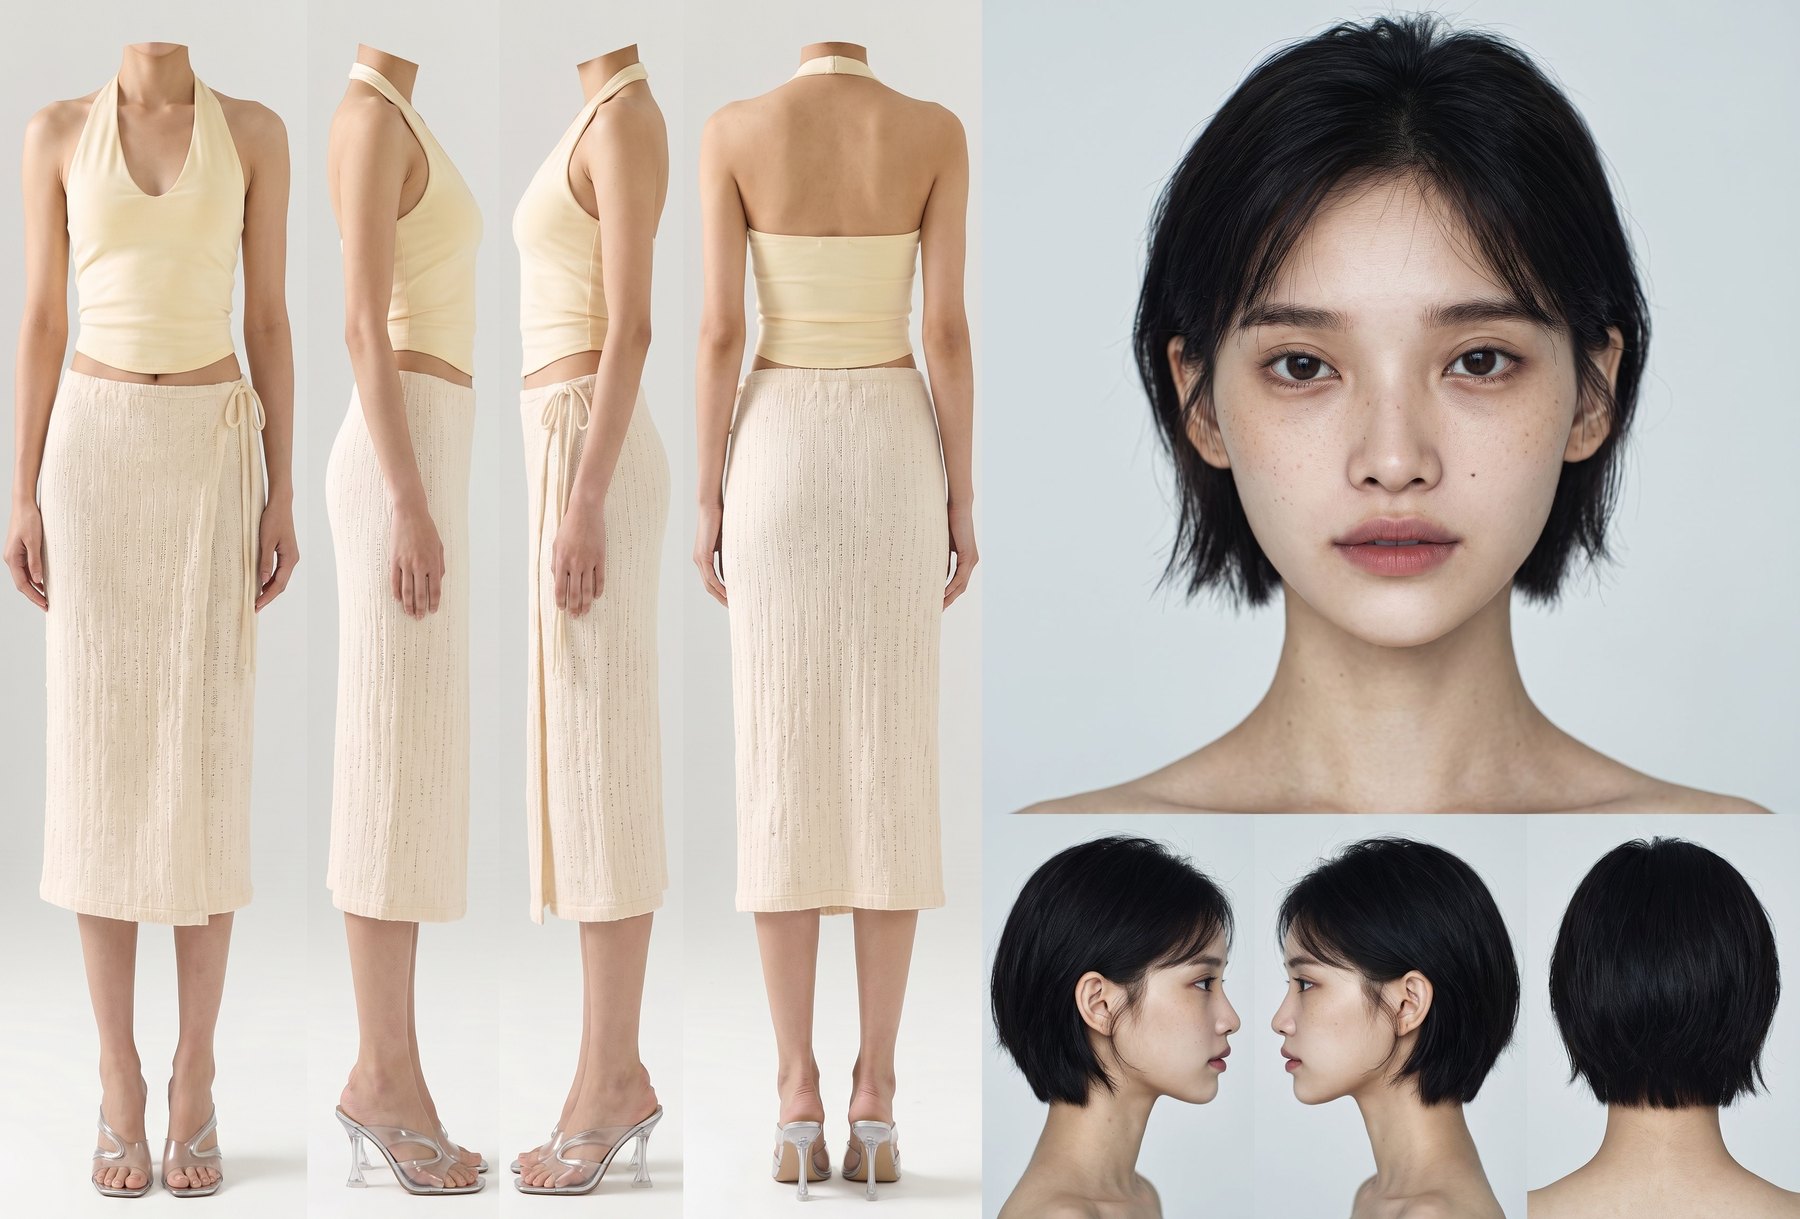
A finished character sheet. The four cuts on the left have no heads, and the four facial views attach on the right. This single sheet handles both front work and back work.
05 · The Test
The design sounds reasonable, but whether a back cut made in one pass is actually usable is something you have to run. We picked a garment with a difficult back.
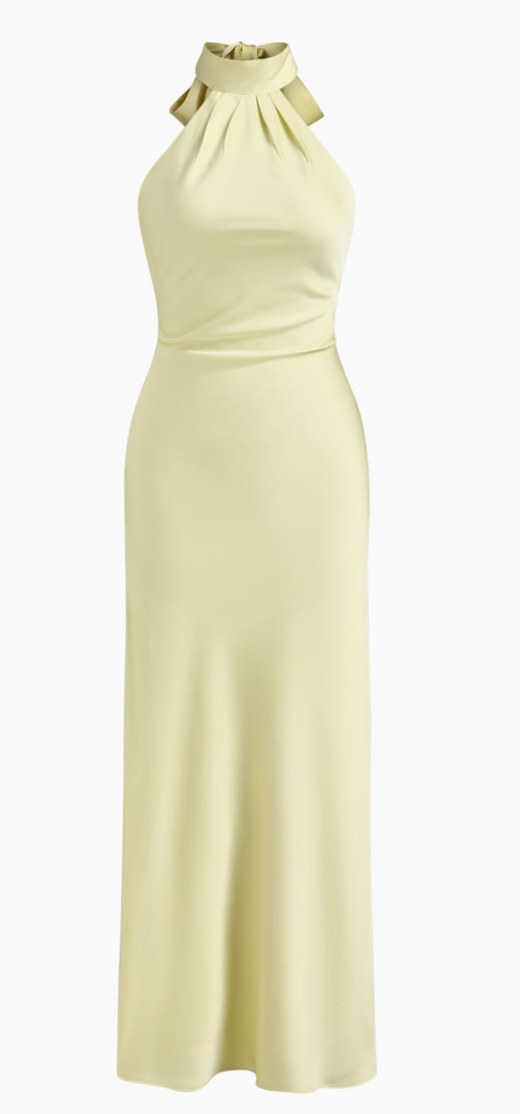
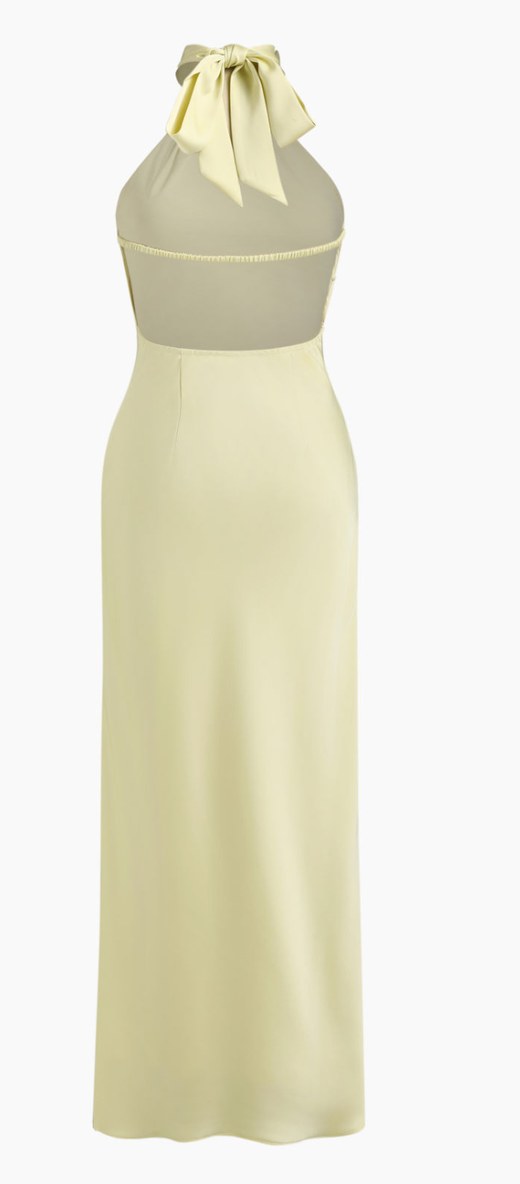
A pale yellow halterneck maxi dress. From the front it is a plain sleeveless dress with no detailing. Turn it around and there is a large bow at the nape, a fully open back, and a horizontal band running across it. The front photo tells you none of this.
We set a baseline first. Upload only the front photo and request a back shot the existing way, to see what comes out when the reference has no back in it.
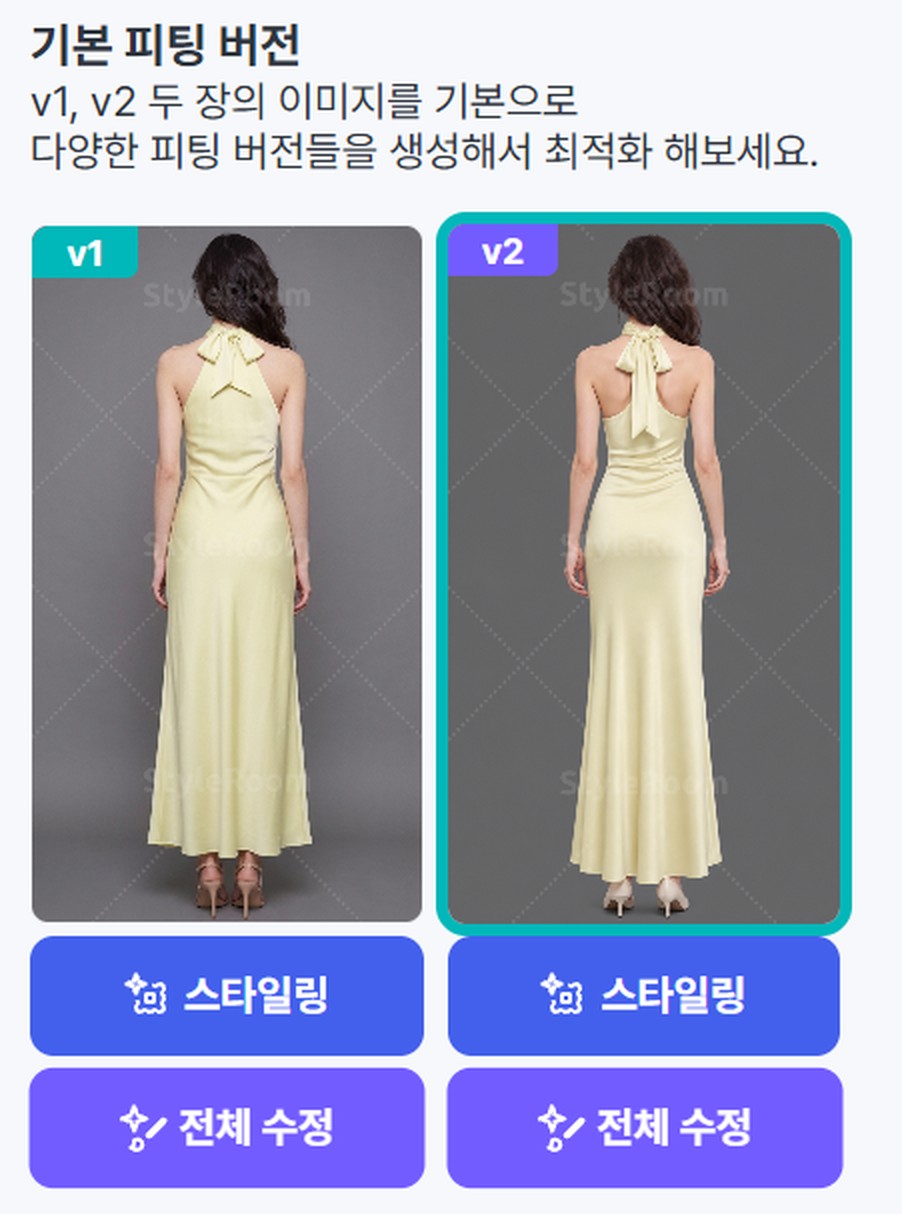
Both photos show a closed back with a thin strap trailing down. No large bow, no open back, no horizontal band. What is worth noticing is that both got it wrong in the same way. This is not bad luck. What is not in the reference cannot be right in either draw.
To head off a misreading: a character sheet imagines the back exactly the same way if there is no back photo. It is not a technique for inventing detail that was never supplied. What a character sheet changes is one pass, no drift between views, and a face at full size. The photos above are a baseline showing how much the back information decides.
Now the character sheet. Both the front and back photos go in, and all four directions are generated in one pass.
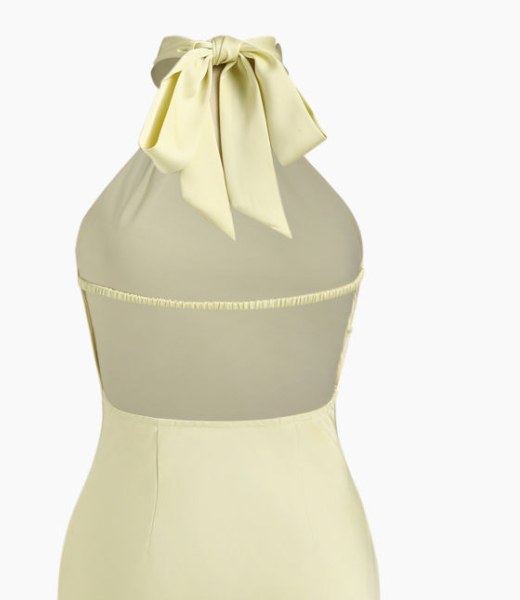
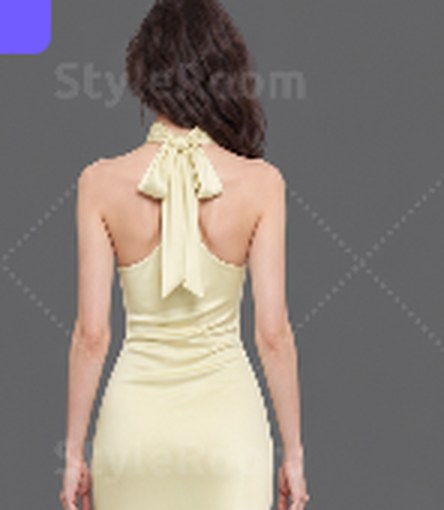
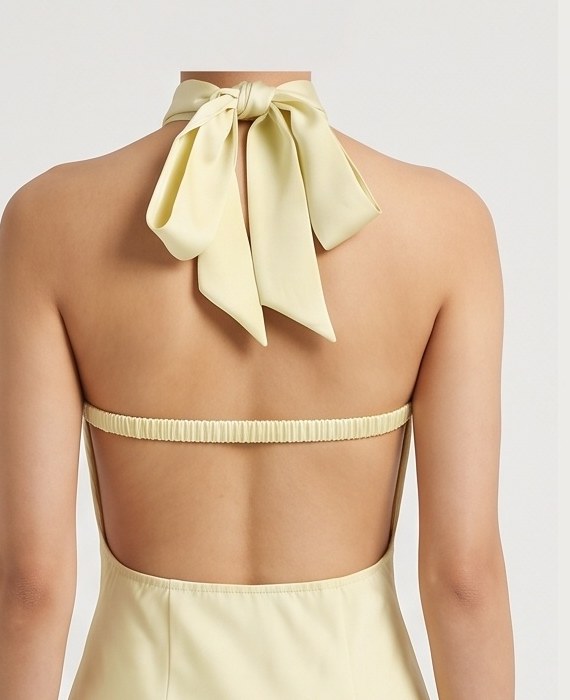
Side by side on the same region, the difference is plain. The middle has a thin strap instead of a bow, and the back is closed. The right matches the left down to the knot of the bow, its trailing tails, the open back and the horizontal band.

The full character sheet from the same test. Because the four cuts came out of a single generation, the tail of the bow falls over the shoulder in the same place in both side views. That is hard to match when front and back are pulled separately.
06 · Coming Soon
Back to the two gaps we opened with.
Character sheets are coming to StyleRoom soon. Pick a model and a garment, and a single sheet carrying four directions and the face gets made first; every styled shot after it is built from that sheet. Whether you use the front or the back, it is the same person in the same garment.
Three posts in, we keep telling the same story. Vol.09 was about reducing the garments a model has never seen. Vol.10 was about turning unstable results into data. This one is about reducing what the model has to imagine. Putting generative AI into a product means closing off, one at a time, the places where the model is allowed to make things up.